
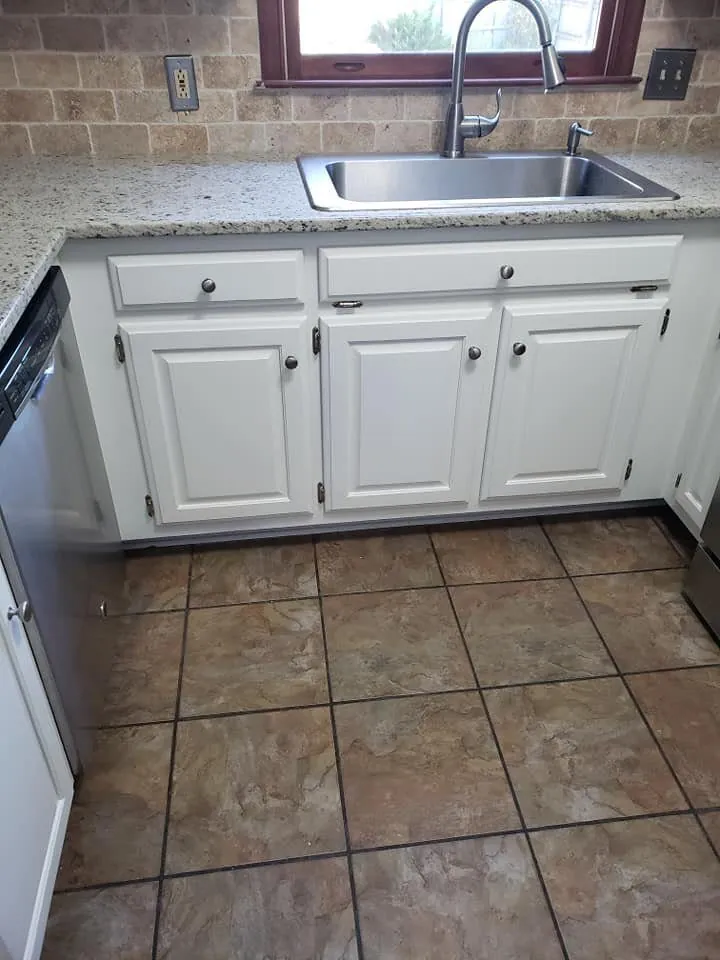
Cabinet refinishing is the least forgiving painting work there is, and it is not close.
A cabinet door is a flat panel at eye level in the best-lit room in the house. It gets touched, wiped, knocked and opened thousands of times a year. Light rakes across it from a window and from under-cabinet fixtures at the same time. There is nowhere on a door to hide a shortcut, and unlike a wall, you are looking at it from eighteen inches away while you make coffee.
Here is the whole sequence. The interesting part is how much of it happens before anything gets a color on it.
1. Look at what you actually have
Before anything is quoted, the boxes get checked, the door material gets identified and the grain gets discussed.
Boxes first: pull everything out from under the sink and press the cabinet floor and the back corners. A slow trap leak swells particleboard from the inside and it does not come back. Doors second: solid wood, plywood and MDF all refinish well. Thermofoil — a vinyl film heat-wrapped over MDF, common from the late nineties on — does not, and if it is lifting at a corner near the oven or the dishwasher, refinishing is the wrong answer for that kitchen.
That conversation belongs at the walkthrough, not after a deposit. There is a fuller version of it in are your cabinets worth refinishing.
2. Number everything
Every door and drawer front gets numbered and its position recorded before it comes off.
Doors are not interchangeable. They were hung, adjusted and lived with in one opening, and hinge positions and reveals settle to that opening over years. Put a door back in a different hole and it never quite closes right again. It is a five-minute job at the start and it cannot be fixed at the end.
3. Take the doors off and seal the kitchen
Doors, drawer fronts and hardware come off. Counters, appliances, floors and openings get masked and covered.
You keep the use of the kitchen. The sink works, the refrigerator works, the counters are usable. You are without cabinet doors for a few days, which is less disruptive than it sounds and considerably less disruptive than a replacement.
4. Degrease
This is the first of the three steps that decide whether the job lasts.
Every working kitchen builds a film of cooking grease on the cabinet fronts. It is worst above and beside the range and it is invisible. Run a finger across a door above the cooktop and then across a door at the far end of the run, and you can feel the difference.
No primer bonds through grease. Not a good one, not an expensive one, not one that says it bonds to anything. A kitchen that starts chipping at the door edges inside a year was almost always finished over a film that was never removed. Everything gets degreased, and it gets degreased properly rather than wiped.
5. Abrade
The second of the three.
A factory cabinet finish is engineered to be smooth, hard and non-porous, which is exactly what makes it difficult to stick to. Scuff-sanding gives the new coating a mechanical key to hold onto. Without it you are relying entirely on chemical adhesion to a surface designed to repel things.
This is a job of patience rather than force. The goal is a uniformly dulled surface, including the inside corners of a raised or shaker panel, which is precisely where a fast job stops sanding because it is awkward.
6. Fill and sand flush
Dings, dents and old hardware holes get filled and sanded flush.
If you are changing handles or hinges — and this is the ideal moment, since everything is already off — the old holes get filled and the new ones drilled while the doors are in preparation. Trying to do it afterwards means damaging a finished door.
Open-grain woods deserve a decision here. Oak has a strong grain pattern, and under a light solid color that pattern still reads through the finish. Some people want that; it looks like a painted wood kitchen because it is one. If you are picturing a smooth modern door, the grain has to be filled at this stage, which is real extra work and a real extra conversation. Either answer is fine. Finding out at the end is not.
7. Prime with a bonding primer
A general-purpose wall primer is not the product for this. Cabinets need a primer formulated for adhesion to a hard, previously finished surface, and on some woods one that also blocks tannin from bleeding through a light color.
Boxes get primed in place. Doors and drawer fronts get primed off the cabinets, both faces, edges included, in the area masked off for it at your house — not sent out to a shop. The edges matter more than the faces, which is the point of the next section.
8. Two full coats, cured properly between them
The third of the three, and the one nobody has patience for.
Cabinet coatings reach full hardness days after they are dry to the touch. Dry means you can handle it without leaving a mark. Cured means the film has reached the hardness it was designed for. Between those two points a door is soft, and a door that is closed against a frame while it is still soft carries that impression permanently.
So the doors sit. They sit between the coats and they sit again after the second one, and there is no way to compress that with a heater or a fan or a tighter schedule. A timeline that promises a finished kitchen in a day has removed the step that makes the finish durable.
The doors and drawer fronts are sprayed. On a flat panel with a shaker or raised profile, spraying is what puts an even film into the inside corners instead of pooling there, and it leaves no brush ridges running down a door you look at every day.
Both faces get finished, edges included. A door finished on the front only warps eventually, because one face is sealed against humidity and the other is not.
9. Rehang and adjust
Every door goes back in the opening it came out of. Hardware goes back on. Hinges get adjusted so the reveals are even and the doors line up across the run, which is a fussy job and the one that makes a kitchen look built rather than painted.
New bumpers on every door. They cost almost nothing, they stop the door face contacting the frame, and nothing else on this list does as much to protect the finish you just paid for.
10. Walk it with a light
Room to room is for a whole-house job. For a kitchen it is door by door, with a light, with you. Anything you point at gets fixed before the crew loads out rather than on a return visit that has to be scheduled.
Where kitchens actually fail
Worth knowing, because it tells you where to look on somebody else's work.
A refinished kitchen almost never fails across the face of a door. It fails at the door edges, around the handle, and along the top of the drawer front under the counter overhang. Those are the places a hand touches and the places grease settles, and they are the places a rushed job skips because they are the awkward ones.
If you are looking at a kitchen somebody else refinished, open a door and look at its edge. That tells you almost everything.
What refinishing will not fix
It changes the finish. It does not move the dishwasher, it does not make a galley kitchen wider, and it does not repair boxes that have swelled from a leak. If the layout is the problem, the finish is the wrong place to spend.
If the layout is fine and the finish is tired, which is the situation in most of the kitchens we look at, it is the highest-return work you can do to a house. The full service page is here.